Showing posts with label DIY. Show all posts

Bathroom Update

Tuesday, March 5, 2013

Ok time for a quick little bathroom update...

Last time we talked we had just gutted the entire bathroom and it went
from this... to this....


For more before pics and all the gory details check here! 

So an eternity (or maybe just a month) has gone by now and we have made "some progress".
I am a little impatient... can you tell? 
We checked lots of BIG things off of our to-do list and I feel like we are finally in the home stretch. I am so excited to get started on all the fun details! I am hoping to be back next week with the final reveal! 
Stay tuned!!!

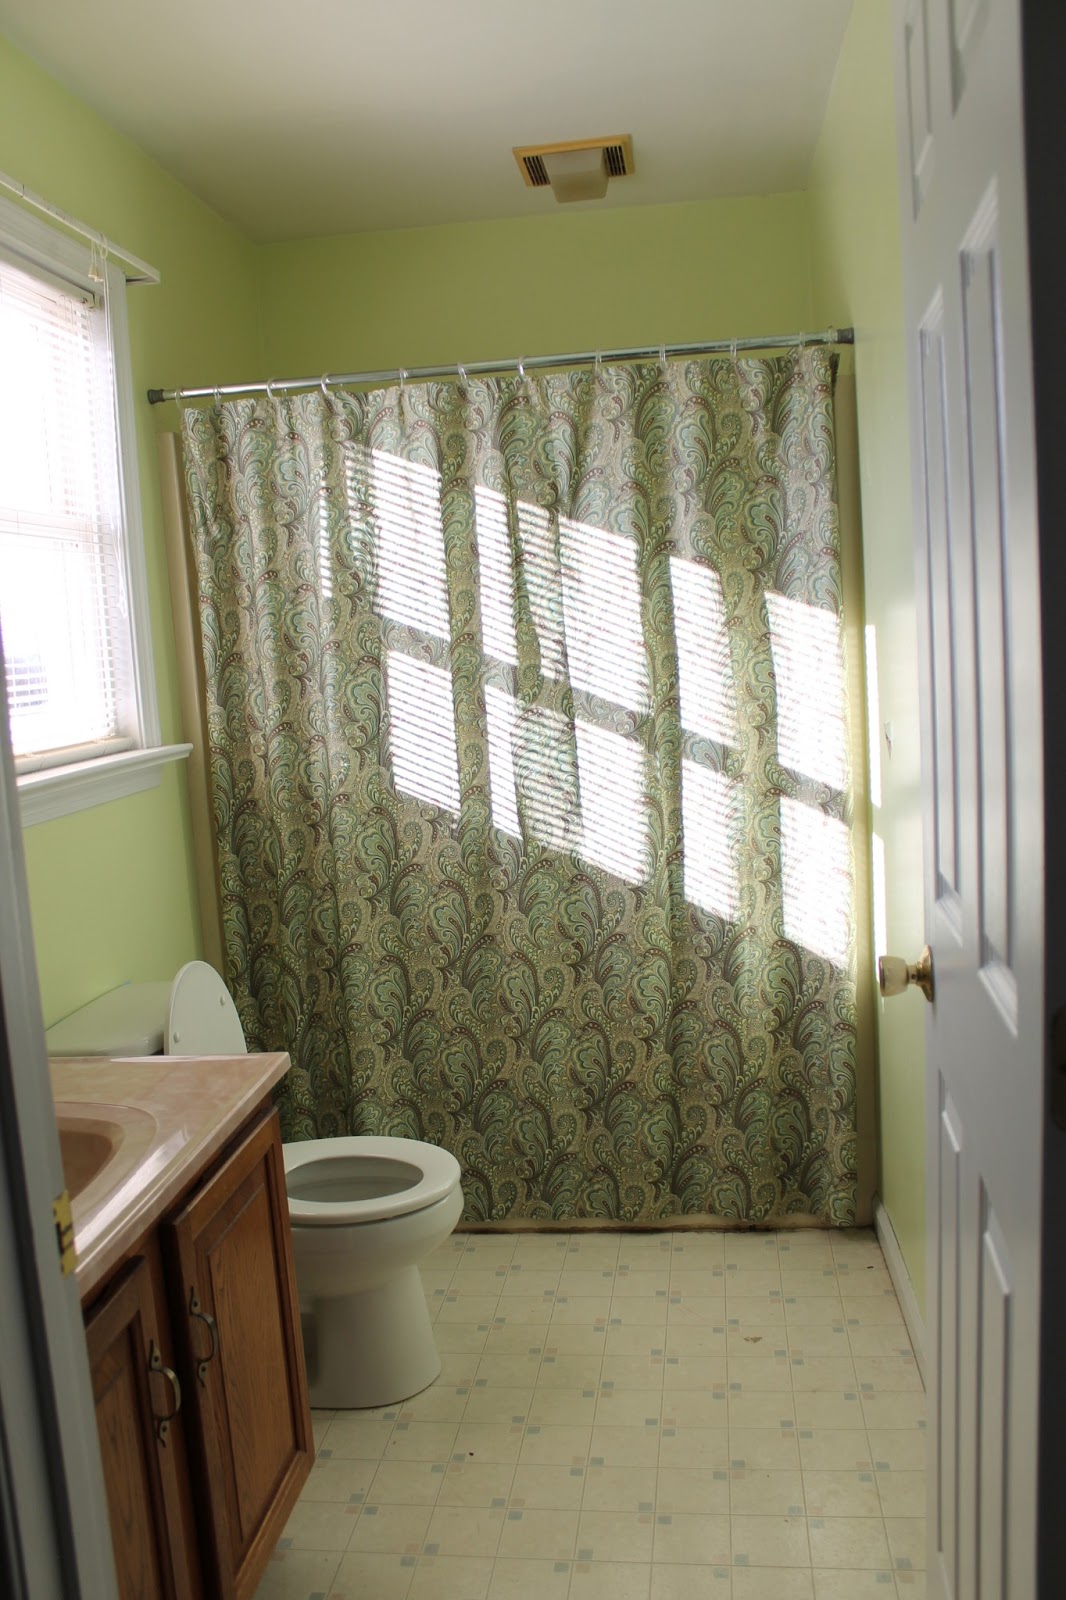
Our bathroom now looks like this.
Yup!!! I'm pretty sure the bathtub is currently serving the purpose of a trash can! 

Don't mind the white goo in the tile cracks...
 that's the grout sealer and I snapped these photos before it was dry. 


New lights. New exhaust fan. Fresh Paint (and stripes... woohoo).
New Floors- my favorite part! I grouted them all by myself!!!! New window. 

All the trim and and baseboards will be finished tomorrow and ready for a coat of paint. 
Then it's time to make her pretty!!! 


Bathroom To-Do List:
1. rip out the old flooring
2. remove the old vanity, counter-top, medicine cabinet, and light fixture
3. HVAC- move the heat vent off of the floor
4.  Plumbing- change out some water lines, and move some pipes (I think), raise the toilet drain, etc. 
5. replace the existing window with a new one
6. replace the exhaust fan and add some recessed lights and an extra receptacle
7. fix the drywall 
8. paint the ceiling and walls
9. install the new flooring- ceramic tile planks
10. new window and door trim and baseboards
11. install new vanity, mirror, and toilet- already purchased just needs to be installed
12. Closet-???? get rid of it? change it???? this is TBD...
Decision: No more pesky closet door! I sure hope this decision works out:)
13. DECORATE- new shower curtain, window treatment, towel holders, other pretty stuff:)


share this on::
Facebook
Twitter
Pinterest
Digg
37 Comments »
Pin It!

The Big Picture

Saturday, February 23, 2013


Yesterday my son turned 6 YEARS OLD!!! What??? I know it's crazy, right? I still can't believe it!!
In typical "Boozer Family tradition" he spent the night before out on a date with Daddy! 
They shopped for his birthday gift and then went out to dinner! They both had such a fun night! 
Since Dave took him out I wanted to do something special for him myself. 


A friend of ours took this picture of my boys a few years ago during one of my husband's hockey games. It has always been one of my absolute favorites!!!


 Jonathon's bedroom desperately needs repainted but since we have SO MANY other projects going on  right now, it may be awhile until I get to it. 
Doesn't mean I can't do something fun to dress up such a blah room, right?

Jonathon's Bedroom Before
So here is the big picture :)
To get started I ran out and got all of my supplies! 
First thing I needed was the large print of the photo. I ordered it from Staples website. It is called an Engineer Print and comes in a few different sizes, but this one, 4ft. x 3ft.is the largest. It can only be printed in black and white and costs only $7.49!!! Woohooo!!!! 

Then I ran to the Home Depot and got a 4'x8' sheet of tempered hardboard for $8.97. A piece of underlayment or thin plywood would have worked too but was much more expensive and not nearly as smooth! What I got worked PERFECTLY!!! 


I had the nice lady at the Home Depot cut the board down to 2'9" x 3'9" so the picture would have a 3" overhang. I also grabbed some spray adhesive while I was there. Make sure whatever adhesive you grab is photo safe or one that won't ruin the print. I purchased this 3M kind. It was actually the cheapest one they had, at $5.44, but also the only one that said "picture safe"... can't beat that! While your out you should also grab a 10 foot long 1x2" or 1x3".  I had these at home so I didn't need to pick them up.

To get started I cut down my scrap 1x2"  into four pieces. I cut two longer pieces, 2 ft. 5inches, one for the top and one for the bottom, and 2 shorter pieces, approximately 2 ft long, for the middle. I attached the 1x2s to the hardboard with small nails.


We then used some screws and wire to create a "hanger" for the picture. I wanted something that would be VERY secure since the photo will be hanging over Jonathon's bed.  We secured the wire onto the top middle board. We drove the screws into the ends, wrapped them with the wire, and tightened the screw to secure it. 


Once we had the back all set up, we put some newspaper down on the floor and gave the whole board a good coat of the spray adhesive. That stuff is crazy sticky and it really doesn't take much to get the job done.
I really don't recommend doing this step inside. We were working in my Mom's kitchen because it was raining outside and it's so cold here that even the garage was freezing but even with the newspaper down, the floor still got a little sticky.


Once the board was sprayed my Mom and I each took a side of the paper and held it tight. She started by lining up the top where we wanted it, and laying it down on the board, while I held my end up form the sticky stuff. :)  


She then started smoothing the picture down very slowly from the top to the bottom. Once the paper touches the glue you only have a few seconds to pull it up and fix any mistakes. We were both SUPER excited about how easy the picture went onto the board. It was way easier then both of us had anticipated! 


And it looked awesome once we had the whole paper on! 


Then we needed to work on the edges. I chose to wrap the paper around the hardboard like you would wrap a present. We stood the picture up and creased the edges of the picture where it should fold around the board. I then sprayed the adhesive while my Mom folded the edges over. 
If you get ANY glue on your hands take a break and wash them before touching the picture. We were lucky to have two sets of hands so one could spray and one could fold over the picture. 


And then you are finished!!! :) Go ahead... pat yourself on the back!!! 


It turned out so much better then I had even imagined!!!
 I absolutely LOVE it!!! and more importantly, so does Jonathon!!! 


Special thanks to my beautiful niece, Sierra, for taking all the photos for me!!! 
(she made me say that:) 


share this on::
Facebook
Twitter
Pinterest
Digg
1 Comment »
Pin It!

Caution!!!! 1980's Bathroom

Sunday, February 10, 2013

CAUTION: These photos are rated U for their extreme UGLYness:) Some of the photos you are about to see may be disturbing to some viewers. Parental discretion is advised. 

Can you believe we have had this bathroom in our house for 5 years now and have done absolutely NOTHING with it? This is our kiddos bathroom/guest bathroom. None of the bathrooms in our home are really worth looking at. They are pretty outdated, but this one is the worst by far, and the other day when our kitchen ceiling (which we just had repainted) started leaking from the bathroom above we knew it was time to get to work.  

So here are some beautiful before photos!!! I should add I know some pretty great stuff came out of the 80's (myself included), but this bathroom is not one of them. 
Don't you LOVE that pink sink????


And this fancy light fixture??? 


And my other personal favorite is this gorgeous vinyl flooring:) Don't mind the dirt! 


Oh we also have these awesome holes in the wall, from the day my 5 year old thought the towel bar should be used for exercising and doing chin ups:) ugh!!! Boys will be boys, right? 


So anyway... we are finally getting started!!! We (by "we" I mean my husband)  basically gutted the entire bathroom except for the shower & tub enclosure. 
Here is my hunky hubby hard at work!!!! Sshhh, don't tell him I posted his picture:) 


Once the floor was ripped up we realized that the leak was coming from the pipe that comes out of the toilet and also from the water that my little monsters have been splashing down the heat vent. 


yucky!!!!!

First thing we did was have a friend come over and move the heat vent from the floor to a spot a few inches higher in the wall. Looks better already doesn't it??? :)


Bathroom To-Do List:
1. rip out the old flooring
2. remove the old vanity, counter-top, medicine cabinet, and light fixture
3. HVAC- move the heat vent off of the floor
4. Plumbing- change out some water lines, and move some pipes (I think), raise the toilet drain, etc. 
5. replace the existing window with a new one
6. replace the exhaust fan and add some recessed lights and an extra receptacle
7. fix the drywall 
8. paint the ceiling and walls
9. install the new flooring- ceramic tile planks
10. new window and door trim and baseboards
11. install new vanity, mirror, and toilet
12. Closet-???? get rid of it? change it???? this is TBD
13. DECORATE- new shower curtain, window treatment, towel holders, other pretty stuff:)


Obviously we haven't made much progress YET... but we have a longggg to-do list and I promise to keep you posted!!!! And of course show you what I hope to be, some pretty AWESOME "after" photos.


share this on::
Facebook
Twitter
Pinterest
Digg
1 Comment »
Pin It!

Valentine Mailboxes

Friday, February 1, 2013

So if you follow Bella Caiden on Facebook you already know that I have officially joined the Silhouette Cameo club:) Woohoooo!!!!! I have to say I am lovin' it!!!!  I decided to start out with a few small projects included these super cute mailboxes that I found in the Target Dollar Section. 


Didn't they turn out AWESOME!?!?!? 
Cute little Owls for my sweet little Bella:)


And of course a hockey player for my little man!!! Don't you just love that he is shooting hearts instead of pucks??? I do!! Jonathon on the other hand.... not so thrilled about that! (or the fact that the hearts are pink)


 I can't wait to fill these little cuties with some fun Valentine treats for my kiddos:) 


I LOVE Valentine's Day and can't wait to share a few more Valentine projects with all you, including what we made for Jonny to hand out in class... Soon, I promise! Stay tuned! 


share this on::
Facebook
Twitter
Pinterest
Digg
5 Comments »
Pin It!

XoXo- Free Valentine's Printable

Friday, January 18, 2013


A while back when my hubby and I were dating... like a LONG time ago... high school days:)  I was really stumped on what to get him for Valentine's Day.  I've mentioned before that he is not the most mushy guy around. He is your typical "man's man" and doesn't exactly wear his heart on his sleeve, but I wanted to give him something cheap affordable that he would actually like. He has quite the sweet tooth, so I thought some candy would be fun, but I wanted to jazz it up a bit so I wrote this corny  cute poem to attach and I thought I would share it with all of you. I even created a free printable to make it even easier for you!


There are so many cute packaging ideas for these tags.

 Get it??? The poem says HUGS and KISSES and the bag and the jar are filled with Hershey's Hugs and Kisses! ( my kisses are purple aka dark chocolate... my favorite... YUMMM)
So this is my idea of a super cute, super affordable, last minute Valentine's day gift for that special someone:) 
Hope you guys enjoy!!!! 


click on the image to download the printable:)


share this on::
Facebook
Twitter
Pinterest
Digg
1 Comment »
Pin It!

Guest Post- Faux Suede or Leather Bracelets

Friday, January 4, 2013

YAY!!! Special treat today!!!! My bloggy bestie, Chacoy (who I am always mentioning), from Living in La La Land, has a super cool tutorial for you all. She is absolutely awesome at crafting (even though she will NEVER admit it) and an even sweeter person. She has been such a blessing in my life since we got to know each other during our Package Pal swap awhile back, which you can read about here and here...so please show her some LoVe!!!!

Hey, Hey Bella Caiden readers! It's me, Chacoy from Living in La La Land. I am so happy that Shannon has invited me over here today to share an easy project with all of you. She is so talented and I was a bit nervous and excited when I pleaded with her she asked me to guest post. The project I am going to share with you today is really easy and very inexpensive. I made some of these for Christmas presents and thought they would make the perfect Valentine's Day gift for everyone. What I like about them is that you can change up the faux suede or leather cord to fit the gift recipient oh and did I mention that their inexpensive?

bracelet
Okay, let's get started.

Supplies: (2) Curved tube beads 3mm x 50mm (1) Lobster clasps 10 mm (2) Jump rings 6mm (1) Faux suede or leather cord (2) Fold over cord ends 3mm (2) Needle nose pliers Needle & thread

Step 1 Measure around your wrist to get the right size cord for your wrist. Note: the ends do not need to touch because you'll be adding the cord ends which will add a little length.

Step 2 Take your suede cord and place it into one of the fold over cord ends. Don't put the suede cord all the way to the tip-you'll get some hanging through (not speaking from experience!) Once you've done that take a pair of needle nose pliers and push in one end (You do not need to make this perfect yet just get it to where your suede cord isn't going to slip out). Making sure the cord is in the middle and didn't shift close the side you just pushed down all the way. Next do the other side. It should look like the picture. DO NOT do the other side yet!!


bracelet3

Step 3 Take your needle and thread (long enough to fit through the tube bead). Treat it as if your going to sew except tie it at the top. Put the needle through the tip of your suede cord and then undo the top knot. Place the thread through your tube bead and pulling the suede cord through.

bracelet6

Step 4 Repeat step 2 on the other side.

Step 5 Take one of your jump rings and hold it on each side of the opening with your needle nose pliers. Holding one side of the jump ring and pliers still, with the other set of pliers push/bend the jump ring forward and add your lobster clasp. Close it the same way you opened it and add it to your fold over cord end. *If you push both sides of the jump ring, one back and one forward it makes it so your jump ring won't come together as flush and this will cause your rings to slip off and ultimately your bracelet to fall off! (Again, not speaking from experience)


bracelet7

Step 6 Take the other jump ring and do the same thing except this time open the jump ring a wee bit smaller, add it to the other end of your fold over cord end and close.

Step 7 Admire your work!

bracelet8

Don't you think these would look really cute in different shades of pinks and purples for Valentines Day?
Thank you so much Shannon for having me here today.

share this on::
Facebook
Twitter
Pinterest
Digg
7 Comments »
Pin It!
 
Pin It button on image hover